Registering Students in SDMS
For many states, there are two ways to upload student data in SDMS—either by uploading a bulk registration file or by entering a student registration individually. Only users with a role that was designated by the state to include test registration permissions will be able to access either of these features to register new students.
You should register your students through a bulk upload of all eligible student registration data from your student information system no later than three days before you intend to test.
Approved accommodations in SSD Online will appear in the student's record in SDMS (discrepancies between the records that prevent automatic matching can be manually force matched within SDMS). Approved accommodations may be waived in SDMS (not in SSD Online) if a student chooses and their guardian consents.
Student rosters from SDMS automatically populate in Test Day Toolkit within one business day. Student registration and accommodations data in SDMS determines the generation of a student's individual test in Bluebook.
How to Register an Individual Student
Find the Register Students link on the main navigation bar and then select the Add a Student submenu option.
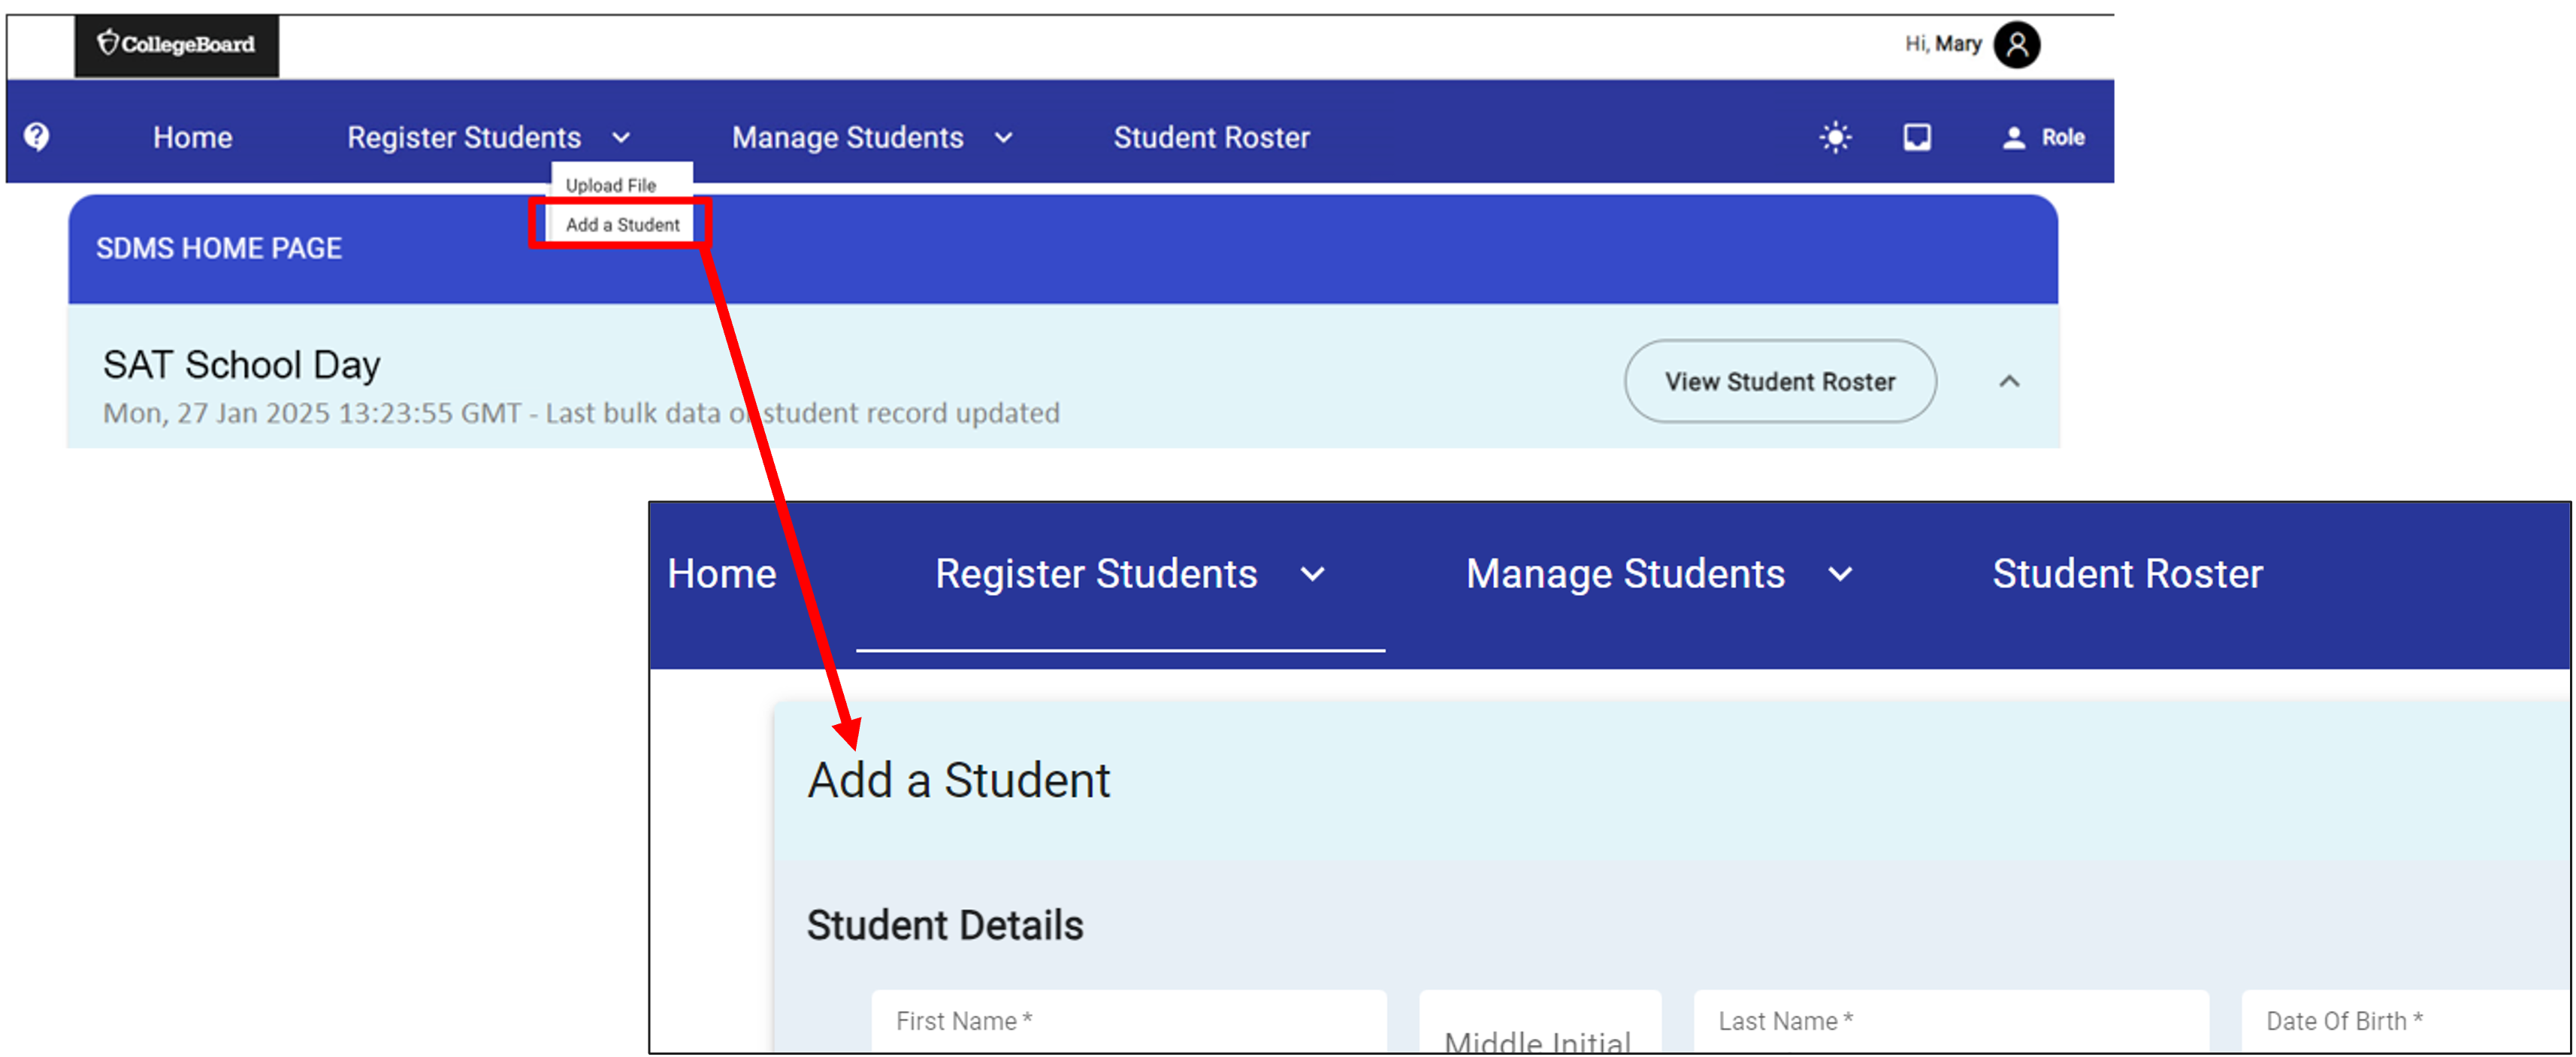
An Add a Student screen will appear. Enter all required information (indicated by an asterisk), such as name, date of birth, gender, grade, state student ID number, and the AI code for the school the student attends, and then select via checkbox which assessment the student is taking.
If you see an error message that the student already has a state registration at another school, you will need to stop and follow your state's chosen protocol for student transfers. (For Colorado, Idaho, Kentucky, and New Mexico, see the Transferring Registrations Between or Within Districts section in this online guide.)
Once all required information is complete, click the button at the top right of the screen to add the student.
How to Register Students via File Upload
File uploads must be supplied using a file template.
To download the file template, click the Question Mark icon in the main navigation bar. Next, click the chevron (down arrow) to the right of File Layout and Specification and download the SDMS Data File Template and SDMS Student Data Specification files.
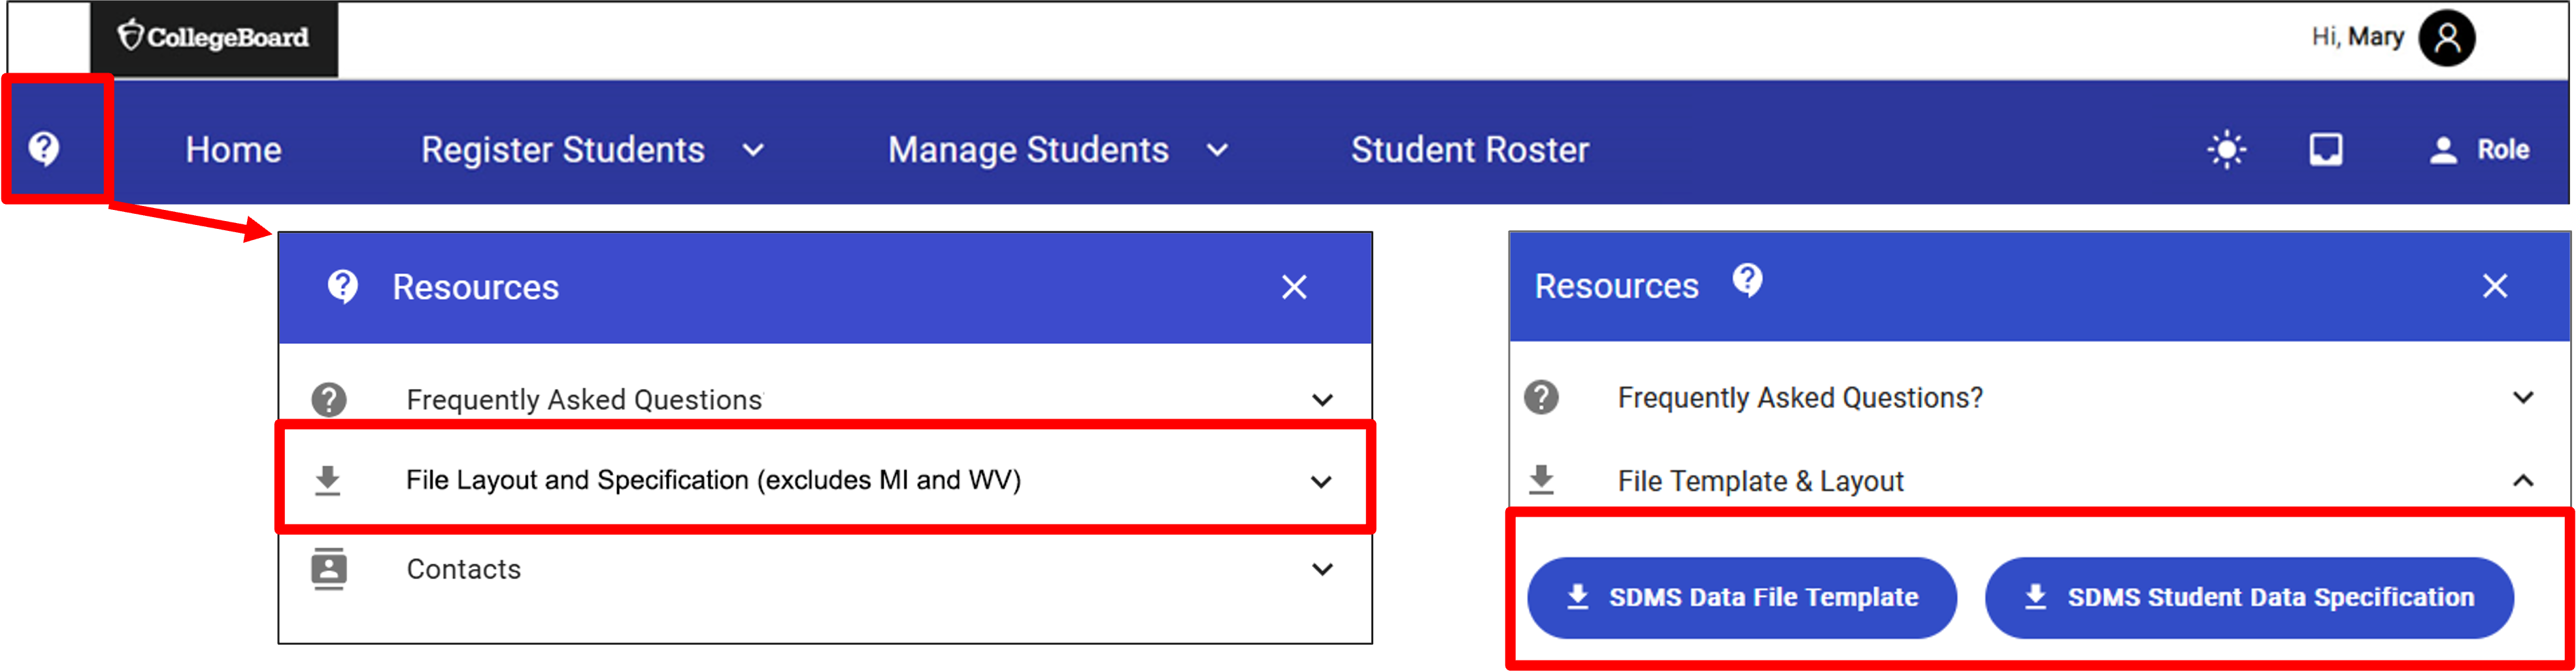
- The file specification document downloads as a PDF. This serves as your "data dictionary" to use along with the file layout template when preparing your data file.
- The file layout template is a downloadable CSV file.
Enter your student data into the template for uploading, following the specifications for required fields and entry format. Do not delete or change the column headers. The file you create must have the exact column headers and follow the data specifications. Save the file as a CSV file for upload, not an XLS file.
Once you have prepared your CSV file for upload, click on the Register Students tab on the SDMS home screen and choose Upload File from the dropdown menu. Drag and drop your file or Browse and select your file. Once the file has been added, click Continue.
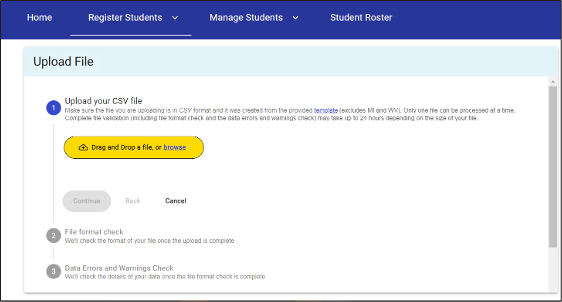
Only one file can be processed at a time. Complete file validation (file format and data) may take up to 24 hours depending on the size of the file.
After you submit your file, a pop-up message will appear on the screen to tell you that the validation process has started. You will also receive an email during validation notifying you that SDMS has received your student data file and that processing is underway.
File Format Validation
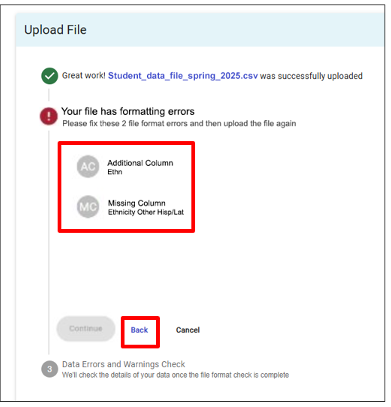
If the file validation process determines that there are errors in the file format, SDMS will list those errors on the Upload File page. Click Back, make corrections to your file, replace the file, and re-upload.
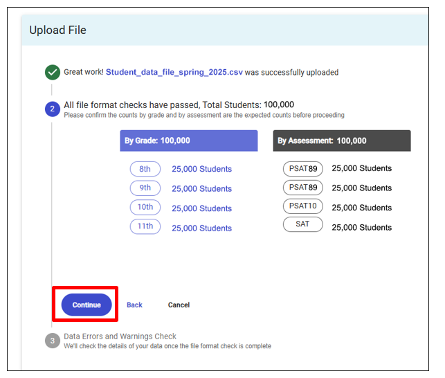
When the file format is validated, the SDMS Upload File page will:
- Confirm all file formats passed
- Indicate the total number of students in the file
- Provide a file content summary with the count of student records by grade and assessment
Click Continue to proceed to data validation.
Data Validation
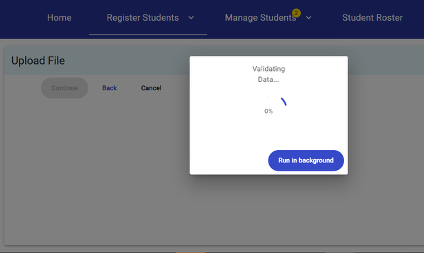
When data is validated, SDMS looks for data entry issues that may need to be corrected. Progress is shown on the screen through a pop-up, which may be dismissed to run in the background to enable working simultaneously in SDMS. You'll receive an email once data validation is complete.
Your data file may contain data errors or warnings. Validation errors must be fixed—a file that contains errors will not be processed. Warnings should be reviewed, but if you are certain the data is correct, warnings will not prevent the file from processing.
There are two options for addressing data validation errors:
- Download the error report, fix the data in the file, and re-upload the entire file (same process as for file format errors)
- Fix the errors within the SDMS user interface either student-by-student or by error type
In addition to the error and/or warning notice in SDMS on the Upload File page, you will also receive an email notification that this issue that requires your attention in SDMS.
Correcting Errors Using Full File Replacement
To correct errors by full file replacement, follow these steps:
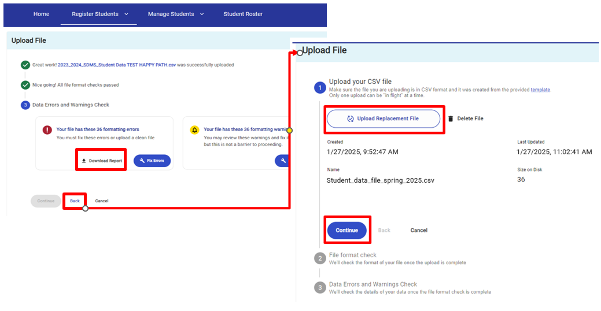
- Click Download Report and use that report to find and correct errors in your original file.
- Click Back.
- Click Upload Replacement File to browse for your corrected file. Once uploaded, details about your corrected file will appear on the screen (e.g., date and time the file was created and last updated, the name of the file, and the number of records in the corrected file).
- Click Continue to validate the new replacement file.
Correcting Errors Directly in SDMS
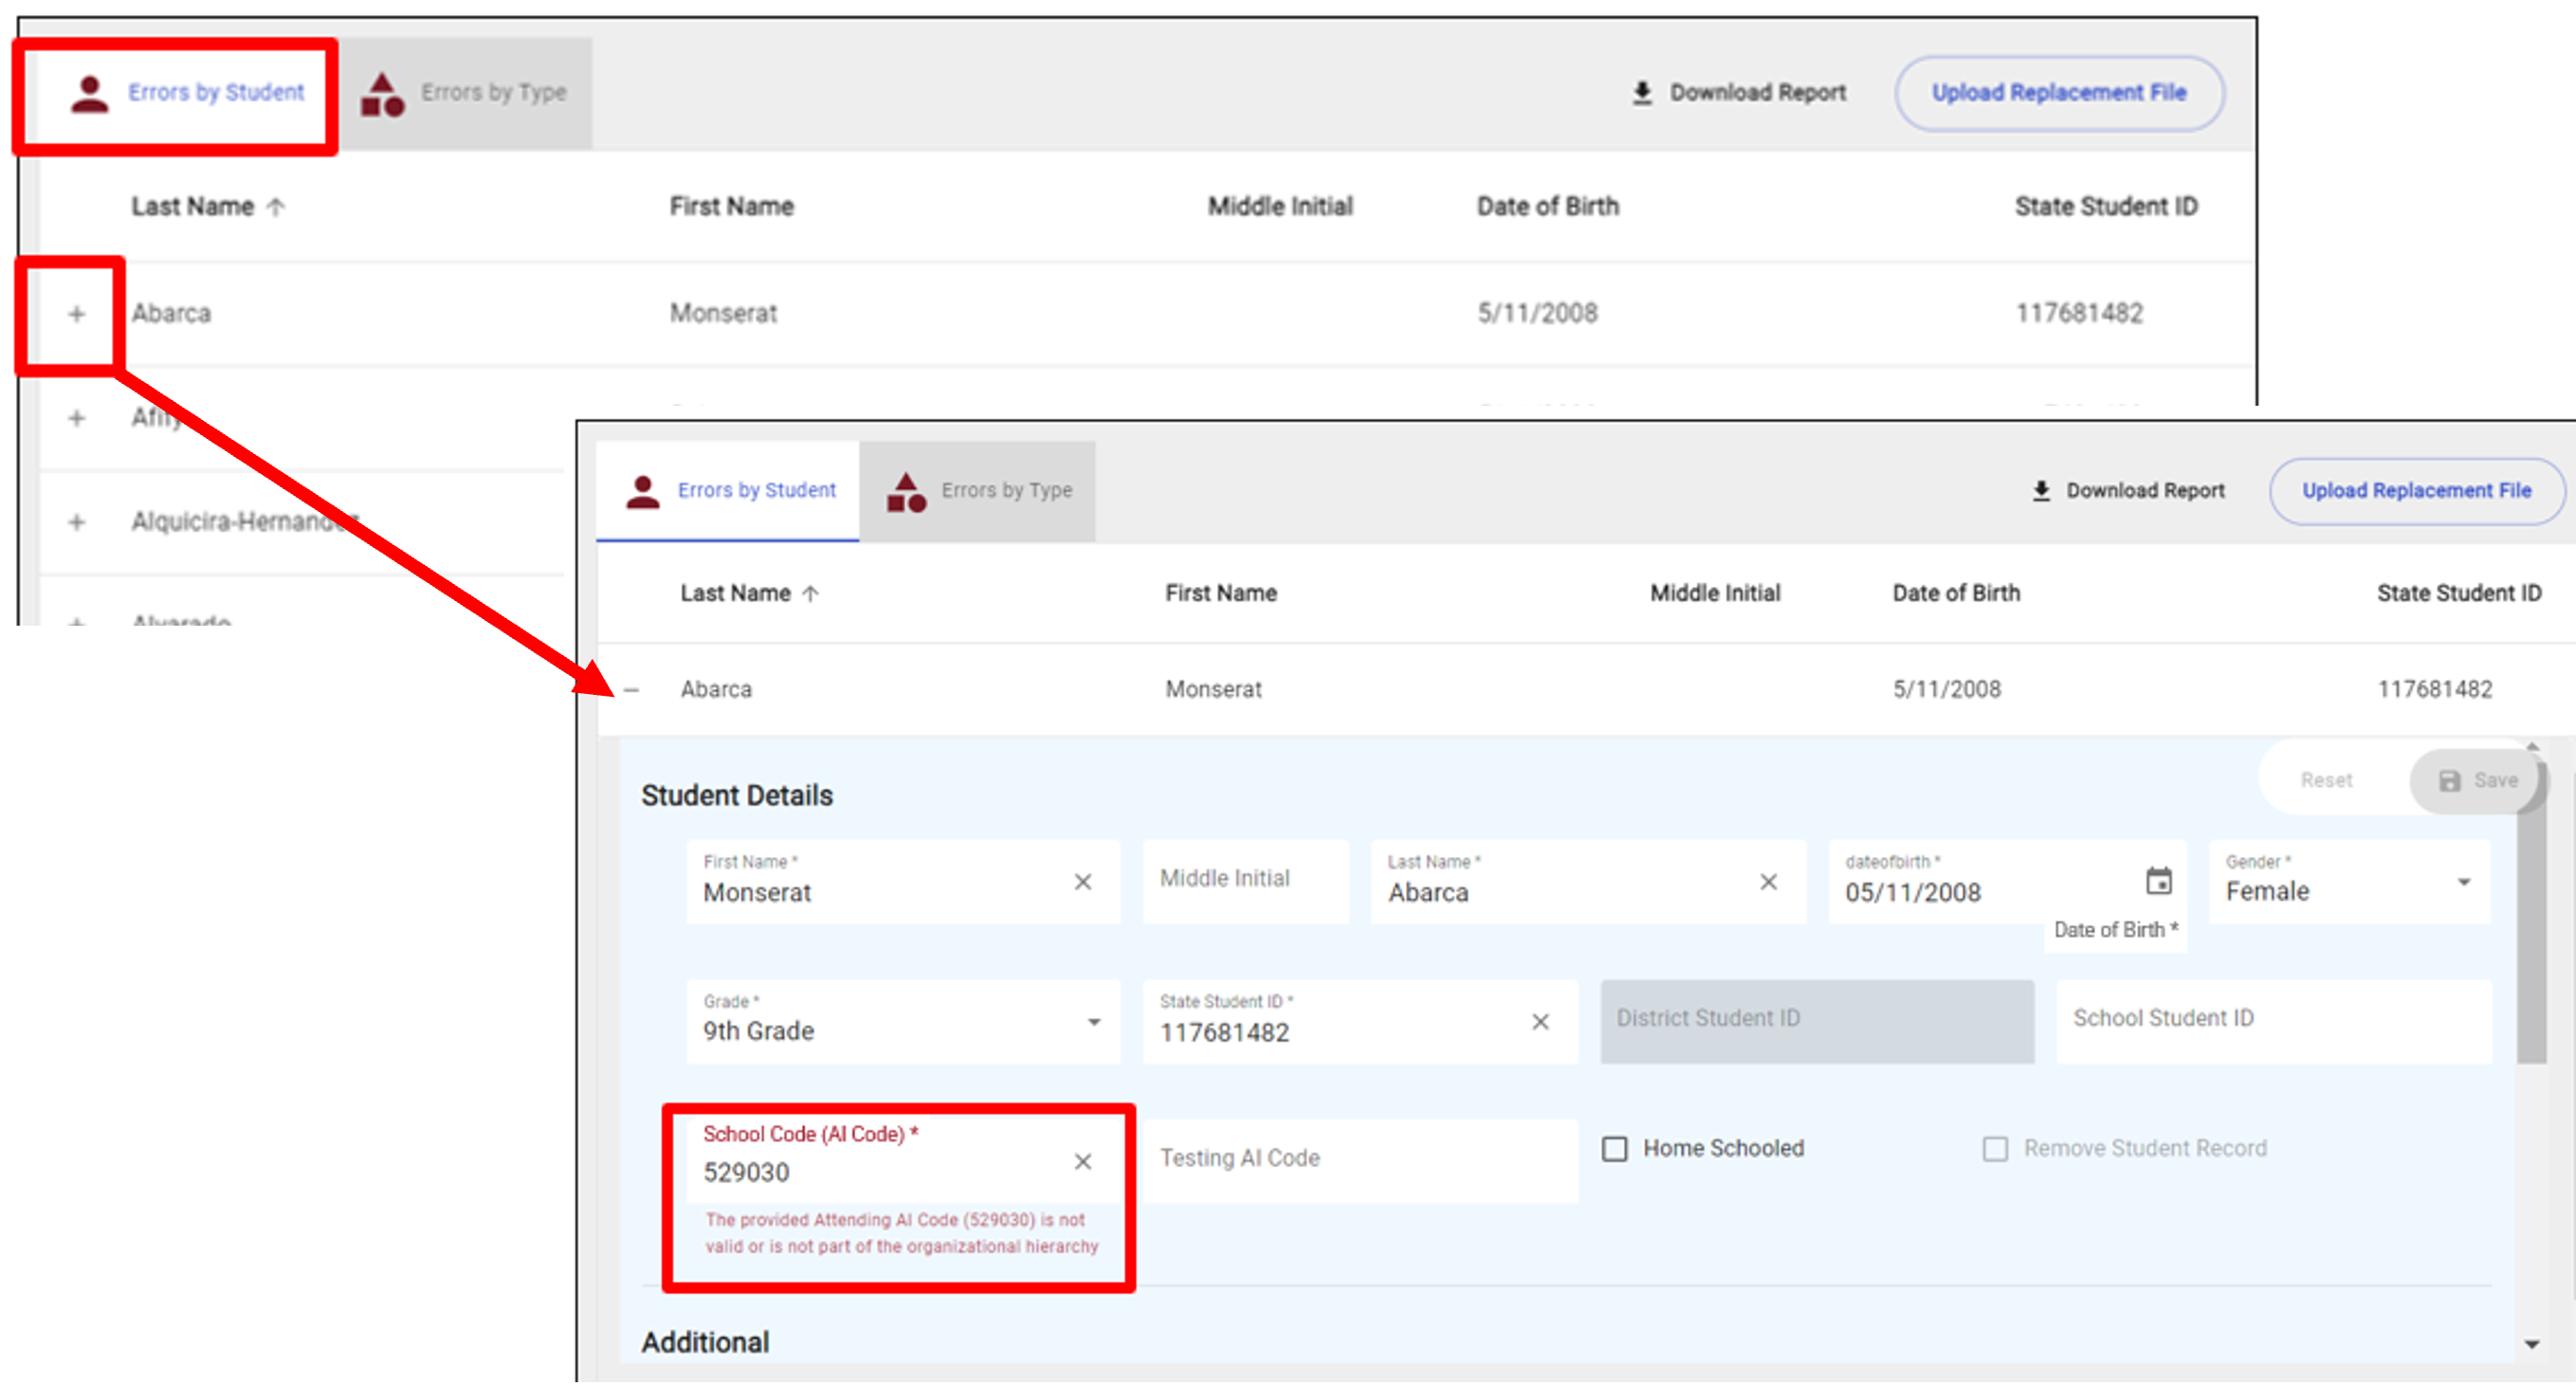
To fix errors directly in the SDMS user interface student-by-student, click Fix Errors on the SDMS Upload File page and then follow these steps:
- Select the Errors by Student tab. Each student record with an error will be listed.
- Click the + sign next to any student's last name to open that student's record. Errors in the student's record will appear in red.
- To fix the errors, make corrections to each of these fields directly and click Save. Once all errors in the record are corrected and saved, the student's record is automatically removed from the errors list and proceeds to revalidation.
Submitting the Student Data File
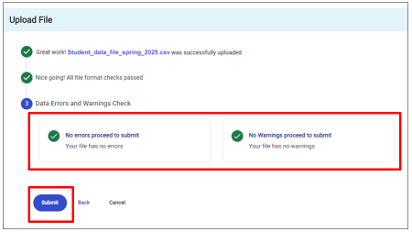
When your file has passed all format and data validation checks, it's ready to submit.
The Upload File page must have a green check mark and a confirmation that there are no errors. Warnings must have been reviewed, but if you are certain the data is correct, warnings will not prevent the file from processing (i.e., a green check mark is not required to proceed). SDMS will also send an email indicating the file is ready to submit. You must click the Submit button on the SDMS Upload File page to submit your data file.